Binding My Own Book (How to Stop Wildfire)
In my attempt to further own my work, I went down the path to try to figure out how to make custom copies of my books.
For the the e-copy, I'm now using iBooks author, which is an overall great success. I been able to attach images, create glossaries, and add floating footnotes. All that has been making the book more personal. Now that's just the electronic version.
For the hard copy version, things got a little bit more interesting. I started out looking at local printing and binding shops. Basically artisan makers of custom books for businesses or even personally use. I learned a great deal by going to the stores and speaking with the owners. There were things I never knew about printing and binding that I learned by speaking with the few businesses that still did it in an artisan fashion. I was highly intrigued as a result; I did more research in bookmaking, binding, and creating artistic copies of books.
After much deliberation, I'd rather try making my own custom copy of How to Stop Wildfire rather than pay someone else to make a copy that was slightly nicer than Createspace copies.
This meant going down the road of printing, binding, and making the cover for How to Stop Wildfire all on my own.
This is what the road ended up like:
Step One: Printing the Book
You can't bind anything if you don't have anything.
To start off, I formatted my book for 8.5x11 sheets of paper as that was the easiest paper to acquire without going into the full on specialty paper world which became expensive fast. I wasn't adverse to spending money for quality, but as this was my first go at making my own book, I wanted to choose products that were easy to get and not that expensive if I screwed up at some point in the process.
As for the 8.5x11 paper I did get, I looked for heavy weight paper that had a nice textural feel. Paper that was nicer than the normal type you usually get but still typical enough it could be printed on a laser/inkjet printer.
I ended up with Southworth Linen Paper. The box from Amazon had 500 sheets which was perfect as the book formatted for 8.5x11 double sided would have about half that.
With the print-ready file and my paper, I had the book printed at FedEx. I was going to do it at Staples as it was slightly cheaper, but I had a bad experience with the person that would printing it so I left and went for FedEx. The guy who did there was super cordial and the process took less than fifteen minutes.
And just like that, the book was printed!
Step Two: Drilling the Holes
An important step for those wanting their book to be connected.
So you can't really do anything more with a stack of paper unless you're glueing it straight to some backing...which would be more difficult. If you're doing your own binding, you're usually threading the pages together with Linen Thread and to do that, well, you need holes. Through all the pages.
Which isn't a trivial task. How I did it was, well, with help. I split the book up into packets, help the packet down on a flat surface, and someone (family member) drilled through the pages with a small Dremel drill bit. We book extra pages on the top and bottom of the packet, which would be used for the next packets 'guider'. This way the holes were (mostly) consistently aligned.
As now the book has holes in it, I was able to actually bind it together.
Step Three: Binding the Book
Bringing it all together.
This was the part where it could all come falling apart. Well, if I did it poorly, the book would fall apart. What I did was take those packets noted above and, using some waxed linen thread, threaded the pages of that packet together. My stitching was rather inconsistent throughout the packets.
After each of the packets were stitched, I began the laborious process of threading the packets together. The book was pretty thick and the holes ought to have been a bit wider so I was only able to get a few rounds threaded between all the packets. In the end, it worked well.
But the binding process isn't over.
So what if you have a book stitched together? You can't just have that—you need to make a spine backing. Usually the spine of the book is glued to a piece of linen that allows the book to move while also providing more support. And that's exactly what I did. For that cloth, I used a piece of old linen napkin glued it to the spine of the book with book glue. And I let it sit for awhile and then it was done.
The book was bound.


Step Four: The Cover
What expresses the book on the outside.
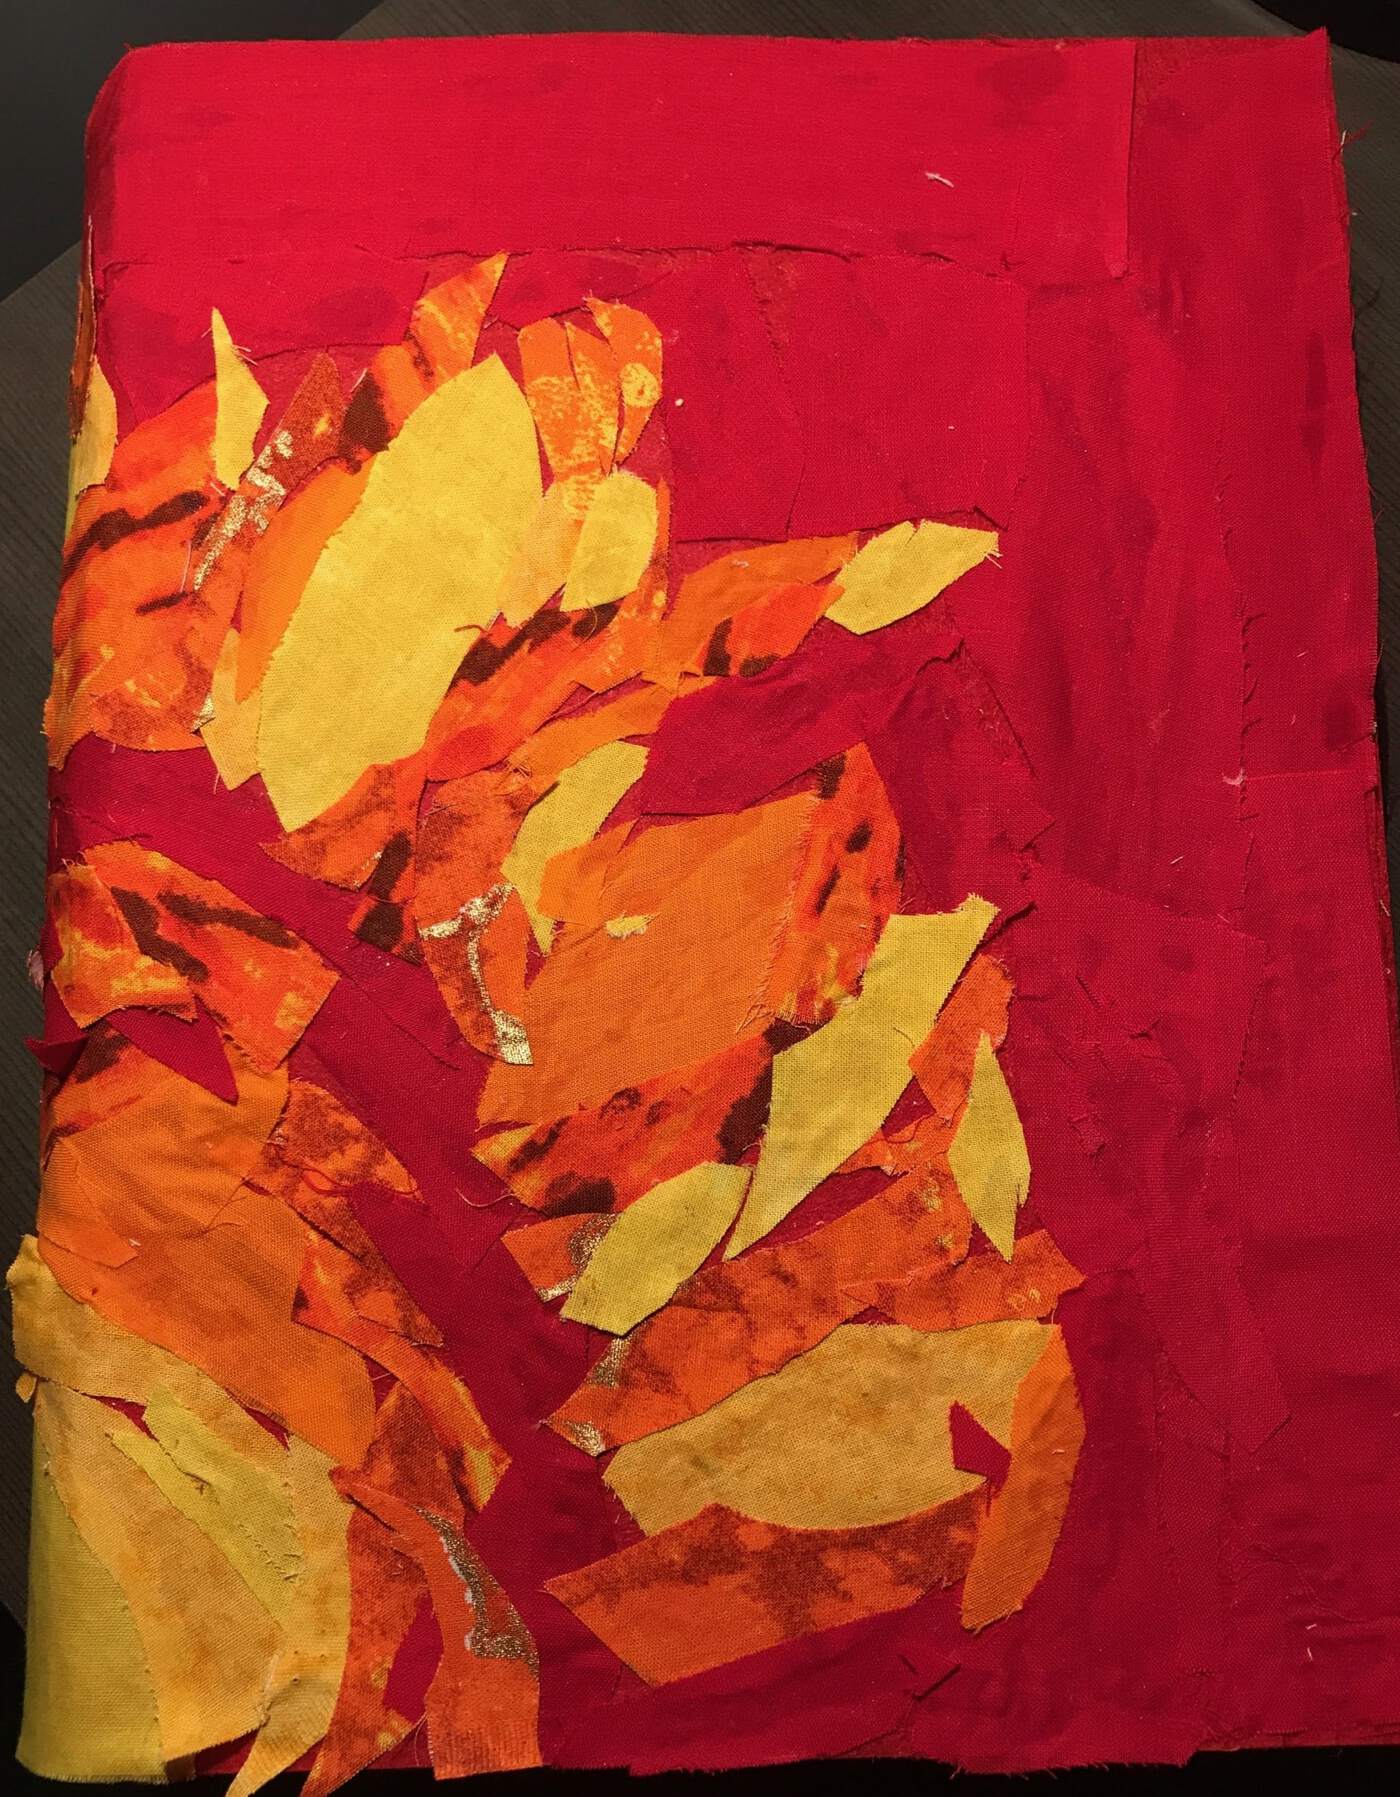
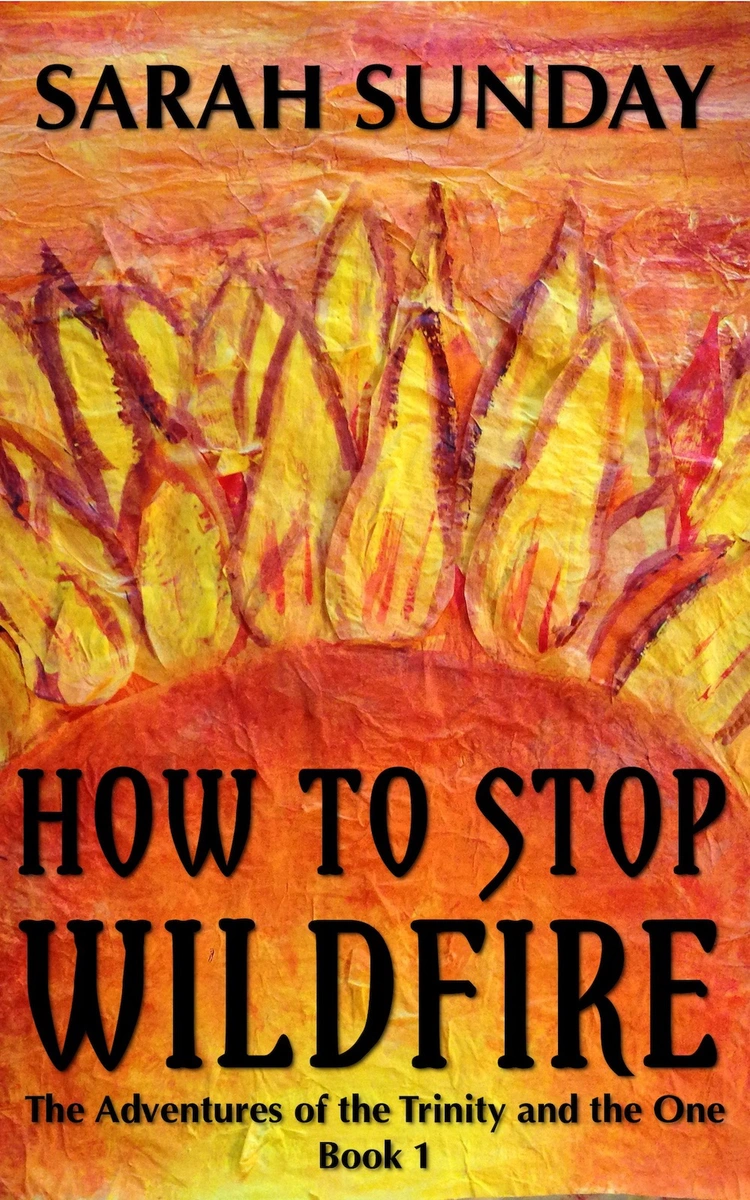
I knew I basically wanted a texturized version of the e-cover of HTSW (which I'm still absolutely in trance with) for the cover of this personal copy.

Many ideas for what materials to use were bounced around. Foil. Feathers. Petals of fake flowers. And so on...but I settled on fabrics.
I would make the flames by cutting out pieces of colored, pattered fabric and then glue it onto a red board that would wrap around the entire book and be the core of the jacket. That red board, for the front and back, was glued onto a stiffer board that would make it sturdier.
Then, after the cover was done, I'd have to attach the cover/board to the book via a flyleaf. The flyleaf would be a piece of linen cloth that I'd glue to a blank page in the bound book and the aforementioned board. I'd also have a red border on the edges of the cover glued to the linen flyleaf to add more 'decoration' to it and cover up some of my, ugh, bad glueing.
And that's what I did. And it actually worked! Glueing it all together was pretty difficult. Next time, I'd definitely use a brush to spread the glue out and make it less uneven/lumpy.


When it was all dry, the book was done.
Cost Breakdown of the Process
Materials
Labor
| Action | Cost |
|---|---|
| Printing @ FedEx |
$60.38 |
| Drilling Holes in Book |
Free (Family member) |
Total: ~ $125 (including tax and so on)
I was expecting about $150 so the process came under. The good thing about some of the supplies I chose is that if I do it again, I'll have glue, thread, and some paper left over so it's not like 100% of the materials were used in the process.
It cost more than the quote I received per book from a book maker–about $80 for a hard cover book if I ordered 20 copies. But that book copy would be not nearly as unique as this one. The cover wouldn't be textured and I wouldn't have experienced this process nor would I have ended up with a book that was really mine.
End Result
Worth it?
Absolutely.
I'm so proud that I made this copy basically on my own. I'm planning on making the rest of them like this. Of course, they will be only for my personal appreciation, but that's really all that matters. I made a book with my own hands. Really made it.
It's not perfect, but it's mine.


Related/Recent Posts
How to Stop Wildfire Tenth Anniversary
A decade is big. It doesn’t feel big to me, but maybe that’s because of the distance. I feel adrift from the significance. The significance is in the past, it is of the past. This type of past doesn’t mean gone, it just means fundamental. It’s no longer fresh, but it is engrained. It is a foundational part of my history and course, yet it is ten years behind me. I’ve changed from there, and yet I am still from...
How to Stop Wildfire Ninth Anniversary
Nine years gone. I’m at the precipice of a decade since How to Stop Wildfire. I feel like I’ve done enough yet haven’t done enough for it. The ten year mark coming up feels like a big milestone that deserves more to show for, but I don’t think there’s any amount of things where I’d think I’d done enough for it. So I’m just going to keep carrying on and doing what feels right. That’s all I can really do...